Don’t hesitate to contact us:
Forum: discuss.graphhopper.com
Email: support@graphhopper.com
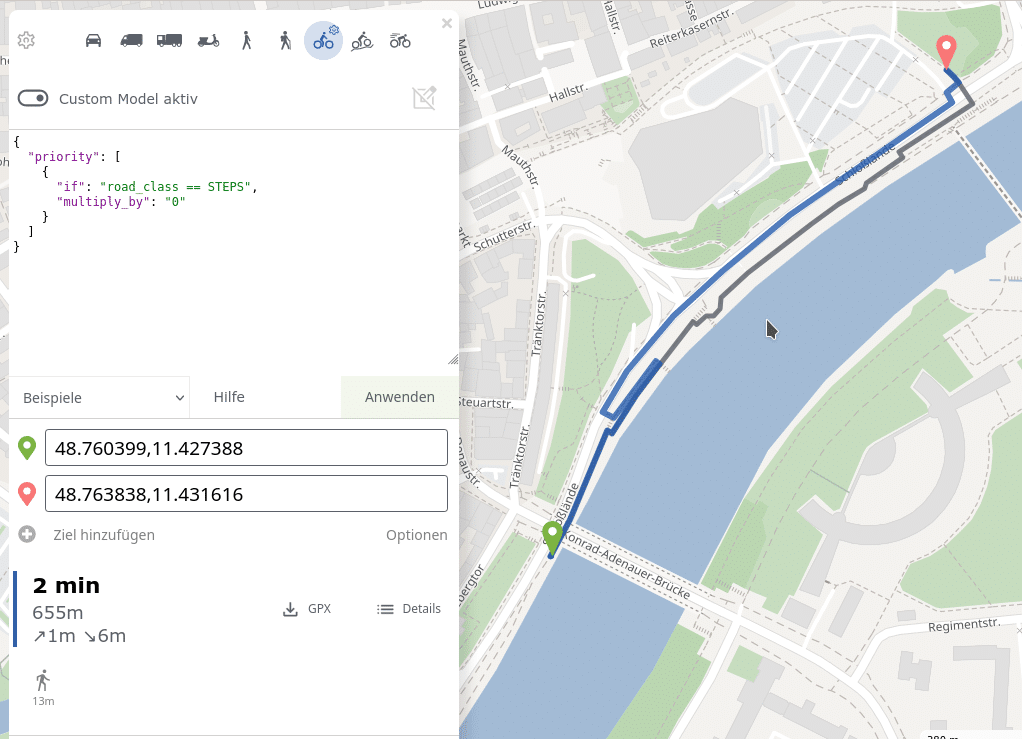
In the past GraphHoper Maps showed obstacles or special cases on the route, but it wasn’t easy to find out where exactly you’ll face them and for how long. These “obstacles” could be steps for a bicycle route or a ferry or if you need to cross borders and so on. Now we made it easy to find out about the details of an obstacle: just click on the “route hint” button below the route result to let the map zoom to it and the route segment will be highlighted in red to indicate exactly where it is. Click the “route hint” button multiple times to loop through all occurrences e.g. when there are multiple ferries.

Afterwards you can modify the custom model to avoid some of these obstacles. To enable the custom model: click on the gear button in the top left corner and select one of the examples and click “Apply”. E.g. to avoid steps you can use this custom model and the route hint with the steps will disappear. Click on the custom model activation button to activate and deactivate the custom model to see the difference:
A few weeks ago we already showed the areas of the custom model and now you can add new areas and modify them directly on the map. First, enable the custom model (gear button in top left and then the custom model activation button). Secondly, click the area edit button (pencil button). Now you can click a few times on the map to create a polygon and as soon as you click on the first location again your area is completed and the area will be excluded. To achieve this a new statement in the custom model is automatically added:
{ "if": "in_area1", "multiply_by": "0" }
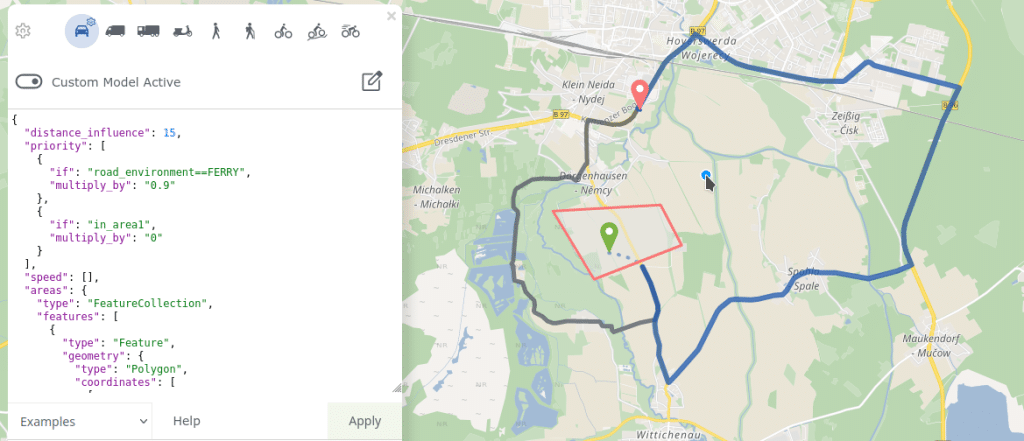
In the image you can see from the dotted line style (also a new feature) that the route ends right at the border of that area. The multiply_by: 0 marks the area completely inaccessible. But you can tune the statement and use it a soft “avoidance” too. For that replace the “0” with e.g. “0.1”.
Or, if you want to modify the speed in this area you move the statement with the “in_area1” to the “speed” array. Often the route does not change from small changes like this but you can debug this easily and view the speed for every road segment in the elevation widget (bottom right corner), where you change the visible edge attribute to “average_speed” via the small triangles. E.g. for the next example you’ll see that all the speeds in the defined area have been set to 30km/h:
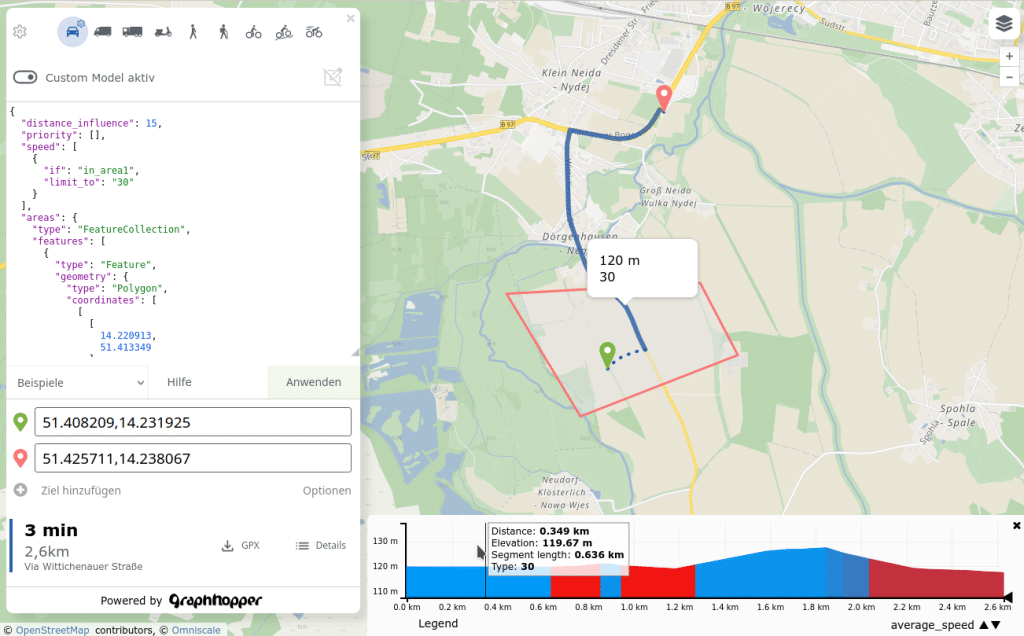
You can see the change better when you disable the custom model: then the speed will be back to 72km/h for this area.
Happy routing!
Read more about the GraphHopper Directions API in the product overview and our API documentation. Sign up and try it out in the API editor or GraphHopper Maps.
Contact us if you need further help with your routing problem.
