Don’t hesitate to contact us:
Forum: discuss.graphhopper.com
Email: support@graphhopper.com
Suppose you have a fleet of 5 drivers and 50 delivery stops. You want each driver to have a fair share of work — not one driver working 10 hours while another finishes in 2.
Until now, you could use min-max to minimize the longest route. But min-max only cares about the maximum — it doesn’t even ensure all available drivers are employed, let alone that they have similar workloads.
The new balance objective solves this by optimizing for equal distribution of work across all drivers.
Instead of minimizing the maximum value, balance minimizes the coefficient of variation (CV) — the ratio of standard deviation to mean — of workloads. This means it actively tries to make all routes similar in length, while still maintaining compact routes where possible.
"objectives": [
  {
    "type": "balance",
    "value": "completion_time",
    "level": 2
  }
]Balance working time (completion_time): Each driver spends roughly the same total time — including driving, service, and waiting.
Balance number of stops (activities): Each driver visits roughly the same number of customers — useful when stops have similar durations.
The level controls how strongly to prioritize fairness over travel efficiency:
| Level | Behavior |
|---|---|
| 1 | Mild balance — accepts some variation for shorter routes |
| 2 | Moderate balance (default) |
| 3 | Strict balance — prioritizes equal workloads |
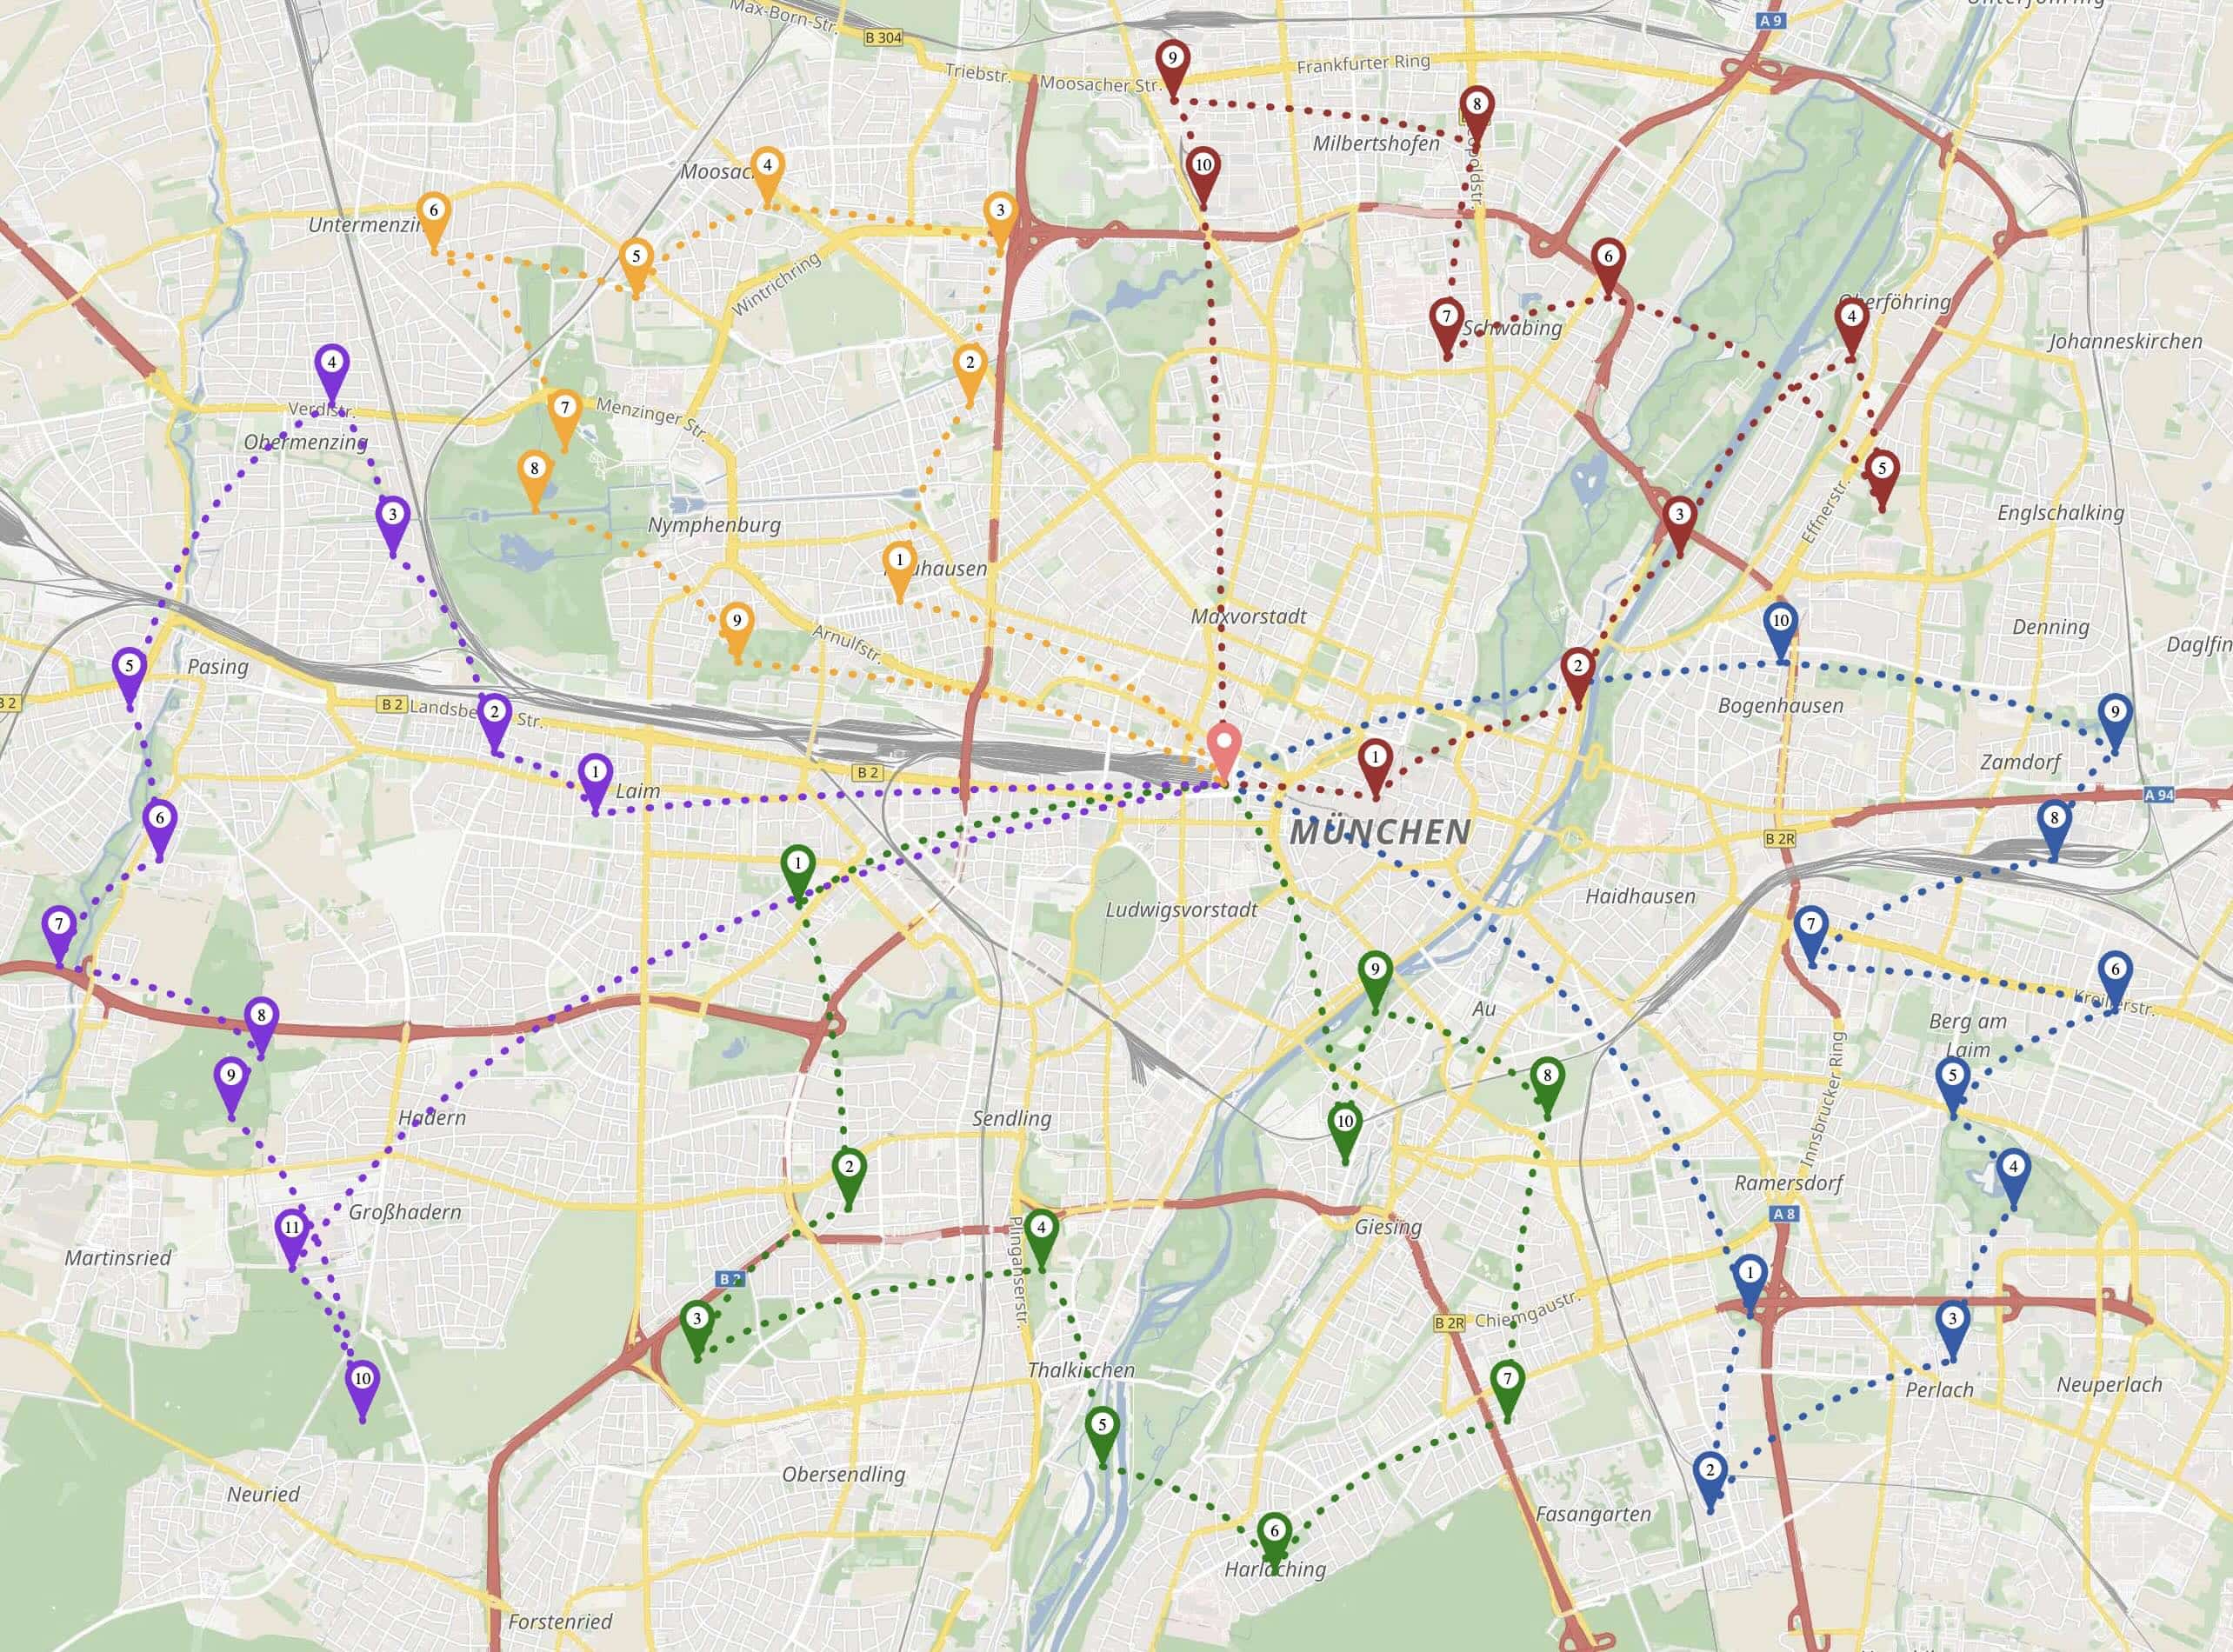
Let me illustrate balancing working time with a concrete example. Consider 50 delivery stops across Munich with 5 available drivers: 10 corporate events (20 min service each) and 40 quick office deliveries (5 min each). (view example request)
| Objective | Drivers | Total Distance | Working Time Range | Spread |
|---|---|---|---|---|
min completion_time |
1 | 141 km | 12h 38min | — |
balance completion_time L1 |
5 | 173 km | 2h 25min – 3h 04min | 39 min |
balance completion_time L3 |
5 | 190 km | 2h 45min – 2h 59min | 14 min |
The default min objective uses only 1 driver — it optimizes total time, not fairness.
With balance at level 1, all 5 drivers are employed with working times within 39 minutes of each other. Level 3 tightens this to just 14 minutes, at the cost of 10% more total travel.
The map below shows how the 5 routes fan out across Munich, each driver covering a distinct area:
What if one stop takes 2 hours instead of 5 minutes? The algorithm compensates by assigning fewer stops to that driver: (view example request)
| Driver | Stops | Working Time |
|---|---|---|
| driver-5 | 4 | 3h 16min |
| driver-2 | 12 | 3h 07min |
| driver-3 | 10 | 3h 12min |
| driver-4 | 12 | 3h 14min |
| driver-1 | 12 | 3h 19min |
Driver-5 handles the 2-hour stop and gets only 4 stops total, while others get 10–12. Yet working times stay within 12 minutes of each other.
In the map below, driver-5’s purple route is the shortest — the 2-hour stop is the most western location on the map. The other drivers pick up the remaining stops:

Calculation is fairly fast for small and medium-sized problems (up to 300 stops). The 50-stop example above completed in about 1 second. With 150 stops and 20 drivers, calculation takes about 5 seconds.
This feature is in beta and currently supports services only. Requests that combine balance objectives with shipments will return a 400 error.
Try it in the API Explorer and let us know your feedback! Full documentation is available at docs.graphhopper.com.
When optimizing delivery routes, not all time spent at a stop is the same. Over the years, we’ve added several timing parameters to model real-world scenarios more accurately. With our latest addition, setup_time, we now cover another common case: fixed overhead when arriving at a location.
Let me walk through what happens when a vehicle arrives at a delivery location:
prevLoc──travel──▶──arrival──▶──preparation──▶──waiting──▶──setup_time──▶──duration──▶──travel──▶nextLoc
                             │                           │                           │
                          arr_time                   tw.earliest                  end_time
arr_time): The vehicle reaches the locationend_time): Vehicle leaves for the next stop| Parameter | When charged | Charged per… | Example |
|---|---|---|---|
preparation_time |
After arrival, before waiting | Location | Finding parking, walking to entrance |
setup_time |
After waiting, before service | Location | Dock check-in, security |
duration |
During service | Activity | Loading/unloading items |
The key difference: duration is always charged, while preparation_time and
setup_time are only charged once per location. If two deliveries happen at the same warehouse, you only check in once.
Use setup_time when you have fixed overhead at certain locations that:
{
    "id": "delivery-1",
    "address": { "location_id": "warehouse", ... },
    "duration": 300,
    "setup_time": 600
}
This models a 5-minute unloading task at a warehouse that requires 10 minutes of check-in, but if you have three deliveries at that warehouse, you only check in once.
For more details, see the setup_time documentation.
Happy optimizing!
